CTC 3D Printer
I bought a CTC 3D printer on Ebay for 550AUD and I've been working on it for a while. It's a cheap printer, but easy to modify and make it as good as the expensive ones. It comes with heated bed and dual extruder, the build volume is 220mm x 150mm x 147mm. The hardware is driven by a Mightyboard. It's basically a cheap copy of the Fleshforge Creator.
Straight out of the box, one of the Y-axis ball bearings was broken (very noisy), so I had to replace it. The 40 mm fan at the bottom (to cool the board) was broken too, it's not really needed but I replaced it.
After some time researching the internet and working on it I achieved a level of quality I never seen before in FFF 3d printers. Here I summarize what I found and the results of my experience. I rated all the modifications by "effort" (how difficult or expensive) and "improvement" (results in the printer quality).
After some time researching the internet and working on it I achieved a level of quality I never seen before in FFF 3d printers. Here I summarize what I found and the results of my experience. I rated all the modifications by "effort" (how difficult or expensive) and "improvement" (results in the printer quality).
FIRMWARE UPDATE: SAILFISH (Effort 3 Improvement 7)
Everyone suggest to do it. I've seen an improvement in the print quality just doing this update. Plus, Sailfish add new and very useful tools and features to your CTC. Here is the process explained to update the firmware to Sailfish. It's a bit messy but it works and it's definitely worth it. One of my favorite functions is the ditto printing: it uses both extruders to print 2 of the same object at the same time, but the object can't be larger than the distance between the extruders (36mm).

Ditto printing with Sailfish firmware
SPOOL HOLDERS (Effort 2 Improvement 4)
The kit usually comes with one of them to attach on the back of the printer, but it doesn't fit the spools with smaller holes, so I printed two of this thinner ones.


The back of my CTC with the filament spools in place
PILLOW BLOCKS (Effort 7 Improvement 6)
One of the first thing I noticed is the y-axis bars bent and moving up and down when they rotate. To fix this you can print a pillow block in each corner (4) and insert a ball bearing to hold the bars. There are many designs on Thingiverse, I used this one (find the assembly instruction on the same page). The ball bearings are cheaper on Aliexpress than Ebay but it takes a couple of weeks for delivery from China to Australia. The rod is 5mm, I used 5x4x10mm ball bearings (no flange). Installing them is a precision job and require the disassemble of the frame. You also have to drill 2 holes per pillow block in the wooden panels to hold them in place with bolts and nuts. I don't know if this mod improved my print quality but definitely it looks more stable and the y-axis rod are kept straight.


The pillow blocks on the Y-axis bars with ball bearing
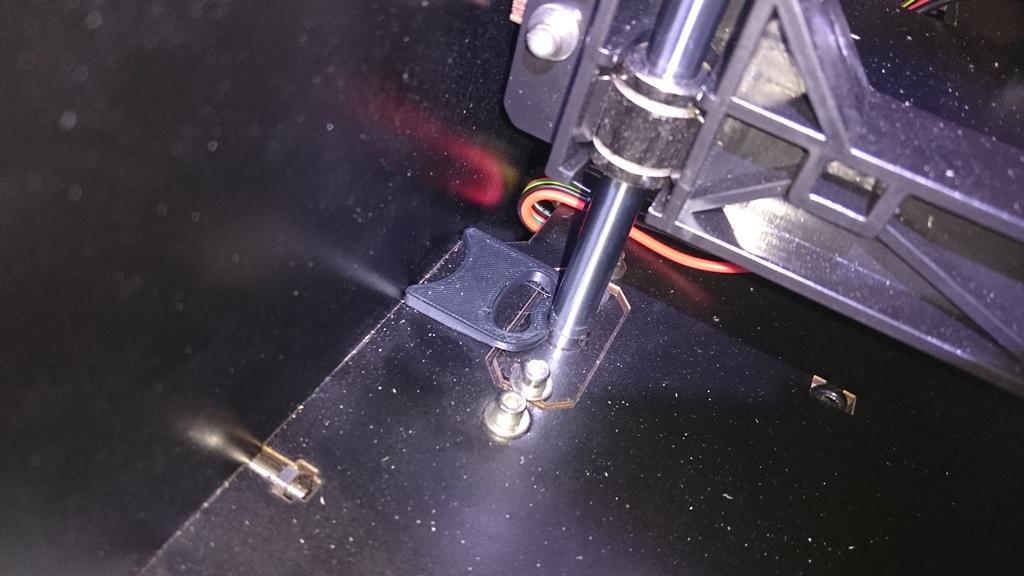
Z-SHAFT PRELOADER (Effort 1 Improvement 6)
Another thing you will notice straight away is that the build platform moves a little bit because the vertical rods are not completely fixed on the frame. To fix that, you just need to print a very simple piece that push the bars forward and keep them in place. Very small effort but a big improvement in print quality because the platform doesn't move around anymore.


Z-axis preloader (left from thingiverse, right from my CTC)
DRIVE BLOCKS (Effort 5 Improvement 7)
The original drive blocks are fixed, which means they are not adjusted to the small changes in filament diameter. A spring loaded drive block compensates for these small changes and it's easy to remove and replace the filament, just pressing the lever to release the pressure. This design also make possible printing Ninjaflex and other flexible filaments, which would clog in the original drive block. I suggest to reuse the ball bearing of the original drive block (concave), but if you want to print flexible filament, a plain ball bearing might be better. If you don't want to print them yourself, you can buy them from Ebay and Aliexpress (some as cheap as 5$).


BUILDTAK (Effort 3 Improvement 6)
The original drive blocks are fixed, which means they are not adjusted to the small changes in filament diameter. A spring loaded drive block compensates for these small changes and it's easy to remove and replace the filament, just pressing the lever to release the pressure. This design also make possible printing Ninjaflex and other flexible filaments, which would clog in the original drive block. I suggest to reuse the ball bearing of the original drive block (concave), but if you want to print flexible filament, a plain ball bearing might be better. If you don't want to print them yourself, you can buy them from Ebay and Aliexpress (some as cheap as 5$).


The driveblock, printed, assembled and mounted on the extruder
BUILDTAK (Effort 3 Improvement 6)
I always had problems with ABS non sticking on the build platform, I tried many materials including blue tape and ABS juice but I've never been very successful. I tried a Buildtak and I solved all the problems at once. It actually sticks too much now. You have to find the right settings with your slicer to print the first layer so it sticks but it's not difficult to remove after print. You might ruin the first BuildTak with your experiments before you find the right settings. I bought it from Aurarum, it's the right size for CTC and decent price. Just stick it on the aluminium plate.

My CTC with BuildTak from Aurarum
ACTIVE COOLING (Effort 8 Improvement 7)
If you want to print PLA properly you need a cooling system. This make sure the layers solidify before printing on top of them. Without it, the print quality with PLA was really messy.
You have to connect another fan (or blower) on the extruders and print a duct to guide the air to the printed part. You can wire the fan to the power supply and add a switch to the circuit, but this way you don't have software control over the active cooling, you have to switch it on and off manually. Or you can connect it to the Mightyboard, so you can control it by software. This is useful because you can adjust the power and the time on and off (usually print first layers without cooling to improve adhesion to the bed). To do that you need to add a component to the board. A MOSFET (PSMN7R0-30YL). It's not an easy soldering job, and it's easy to damage the MOSFET with heat or even just touching it (electrostatic discharge). Also if the pins are shorted (soldered together) it's possible to damage the whole board. So I suggest you to do it only if you are confident with it.
What you need:
-24V fan or blower (better)
-wires
-duct to guide the air to the printed parts.
-MOSFET and board connector or manual switch
Because I had to buy few extra, I'm selling them on Ebay as a complete kit. There's everything you need to make your active cooling, except the duct that you can print (better in ABS).

The complete kit as I'm selling it on Ebay
For the duct I used this design because it's mounted on the back, it can't be seen, it doesn't hide the nozzles and it blows air equally on both extrusions.


The active cooling blower and duct mounted on the back of the extruders
ENCLOSURE (Effort 8 Improvement 4)
To achieve the best results printing ABS, you have to keep the printing volume warm. If the printed part cools down, it will warp up. The active cooling must be switched off with ABS. To build my enclosure I used perspex (acrylic), I bought cheap left over from building companies. For the front door I used magnets, so I can remove it completely. The top hood can be removed quickly too, the back of the hood is fixed to the printer.
The measure I used are:

To join the sides of the hood i designed those joints (there's no hole, I drilled them after):
I didn't notice any improvement in printing ABS (it was sticking pretty well on the BuildTak anyway, and I manly print PLA), but the enclosure protect the printer from dust and attenuate the noise when printing. The front door is held by magnets, so it can be completely removed.


The hood can be removed quickly but the back remains in place

Angle joints (the angle was calculated on the measures in the picture above)


Small magnets inserted in the frame and front window
To close the corners I printed 4 of these pieces, they fit very well.

My CTC with corner fillers
DUST FILTERS AND CONDUCT (Effort 5 Improvement 4)
Dust filters make sure no dust or dirt on the filament enter the extruders, risking to get stuck in the nozzle. I used this design, it make it easy to remove and replace filaments. You need to buy PTFE (teflon) tubes 6mm. They have very low friction. To fix them on the back of the printer I printed this part . Note that this will add some twist tension on your filament. If your PLA is too brittle (or cold room) the PLA filament will snap after few hours when the printer is not used. I still didn't solve this problem, but I'm not the only one. It definitely didn't happen in summer.


The dust filters block mounted on top of the extruders


LIGHTS (Effort 4 Improvement 4)
Having a light you can turn off and on anytime you want inside the case is very useful. I bought these LED from Ebay, I designed a frame to hold them in place and point them to the middle of the build plate. I wired them in parallel with each other and in series with a switch and a potentiometer (if you don't add a resistance you will burn them), and straight to the 24V rail of the power supply. It requires some basic soldering and drilling the frame to fit the LED holders, switch and potentiometer.


LEDs and their holder


Lights switch and potentiometer
LUBRICANT (Effort 1 Improvement 4)
I've read many sources on internet and the best lubricant for 3D printers is dry PTFE. It creates a slippery and protective film on the rails and components, and it doesn't collect dust and dirt. I bought this in Bunnings for 13.5$. There are many others around.

Dry PTFE lubricant
BRONZE BUSHING (Effort 6 improvement 2)
Many people prefer bronze bushings because they are not as noisy as the linear ball bearings (on the x and y axis). I left the original ball bearings because noise is not an issue for me. Bronze bearing also provide automatic lubrication (they are impregnated with graphite).

Bronze bushing with graphite (picture from AliExpress)
ARM STIFFENERS (Effort 4 Improvement 3)
I didn't get those yet because they cost at least 40 AUD, but I'm thinking about it. Sometimes you have to put pressure on the platform to clean it and the plastic arms are not very robust. These on Aliexpress are the cheapest I found.


Arm stiffeners for platform (from www.p3-d.com)
SIMPLIFY 3D (Effort 6 Improvement 10)
I don't usually buy software, but this is worth every cent. It gives you total control, but you can start with basic features and learn new one once you need them. It's also very quick in slicing (nearly instantaneous) and the preview shows you exactly what your printer will do. I tried a cracked version at first and I decided to buy it. The support provides profiles for all printers. In AUD it's about 200$. Go to Simplify3D website.
CONCLUSION
The CTC printer is cheap, and it's not a good printer straight out of the box (you get what you pay!). If you have time and passion it can become a very good printer, very versatile and capable of amazing quality. I hope this post was useful for you, looking forward to hear your feedback.


