Saturday, February 1, 2020

Blynk, ESP8266, XBEE


Blynk, ESP8266, XBEE

AIM

The aim of this experiment is to connect a smartphone app to an Arduino, through the internet. The phone could be anywhere in the world, connected to the internet. One Arduino device will be connected to a domestic Wifi (let’s call it “Home Controller”). This Home Controller will communicate to another Arduino device (let’s call it “Remote Controller”) through Xbee radio transmitters (up to about 3km distance). The final aim is to enable two-way communication between the Remote Controller and the smartphone app. The Smartphone app will be created with the Blynk software.
Example: a farm has a Wifi network in the farmhouse. 3km from the house there is a water cistern and a pump. From the smartphone, we want to see the level of the water in the cistern and start/stop the pump. We also want a feedback to see if the pump is actually running. With this system it’s easy to add more devices (pumps, motors, actuators, and sensors of any kind).


WHAT WE NEED

Obviously we need two arduino boards, breadboards, jumper wires, potentiometers, LED, power supplies. The usual stuff.

ESP8266

The ESP8266 is a low-cost Wi-Fi microchip with full TCP/IP stack and microcontroller capability produced by Shanghai-based Chinese manufacturer, Espressif Systems, compatible with IEEE 802.11 b/g/n Wi-Fi. Basically, it's a modem, but it can be programmed as a controller or server.
The ESP8266 can be programmed with AT commands through a serial interface. It cost about $3.

5V to 3.3V logic converter

The Arduino uses a 5V logic. The ESP8266 uses a 3.3V logic. A logic converter is necessary between them.

3.3V power supply

The arduino 3.3V pin doesn't supply enough power to the ESP8266. It needs a separate power supply. I'm using an adjustable step-down power supply module with LM2596 voltage regulator.

XBEE x2

To extend the range of the microcontrollers, I’m going to use Xbee transmitters. They send digital data using radio frequencies. To connect the Arduino to the XBee module you need an Arduino Wireless Shield. To connect the XBee module to the PC for modifying the settings you need a XBee Explorer board. They can be configured to create very complex mesh networks, but I don't need it now.
The XBee module I've chosen are: XBee PRO series 2. They use 50 mW power at 2.4 GHz frequency (legal in Australia). The range of this model is about 3 km outdoor.

WIRELESS SHIELD x2

To connect the XBEE to the Arduino board, you need a module called "wireless shield".

LCD Displays

I'm using one LCD display attached to each Arduino controller, just to see if they are working correctly and they are sending/receiving the right data. When the devices are working, the LCD displays could be removed. They are the usual 16x2 but one of them has a I2C interface, just so I learn how to use it.

BLYNK

Blynk is a crowdfunded smartphone app editor which can be used not only to create your apps, but also to write the code for the Arduino, in order to communicate with your apps. It’s compatible with many other controllers as well. For small projects like this one, it’s free. Find out more at www.blynk.cc.


LET’S DO IT

SETUP THE XBEEs

Each module has to be configured using the Explorer board and X-CTU, a free software distributed by Digi International. To communicate, the two modules have to use the same ID (the name of the network), and same baud speed; one have to be a coordinator and the other can be router, end device or both. In this case I set one as coordinator and the other one as a router.


ROUTER
COORDINATOR
SH
13A200
SH
13A200
SL
40AD4579
SL
40A8E58A
16bit
B7C
16bit
0
DH
13A200
DH
0
DL
40A8E58A
DL
FFFE

The router DL and coordinator SL are the same.The router DH and coordinator SH are the same.

Once they are installed on the wireless shield of the Arduino, they use the serial port. The USB connection of the PC uses the same port, so there's a switch on the shield: you must select “USB” when using serial to upload a sketch to the Arduino, and “MICRO” when using the XBee to send data.
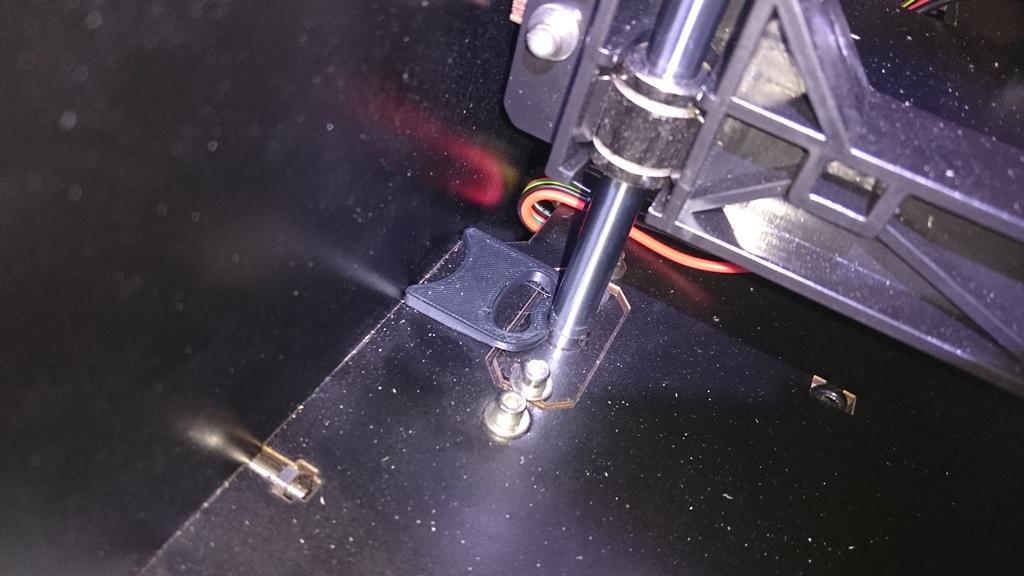
WIRING

REMOTE CONTROLLER

The potentiometer simulates a water level sensor. The led simulates a pump. A pin reads the status of the led to send a feedback to the app (to show that the pump is actually running).


HOME CONTROLLER

This LCD display uses the SDA/SCL pins. ESP8266 uses Serial1 (TX1,RX1). In the logic shifter, the 3.3V reference ("LV" pin) is attached to the 3.3V of the Arduino, not to the 3.3V power supply. If you attach it to the power supply it will give you intermittent faults.


TEST THE ESP8266

Because the pins of the ESP8266 don't fit in a breadboard, I had to build a connector.
The following steps are just to check if the ESP is working.
To setup amd test an ESP8266 through the Arduino, you have to upload and empty sketch from the Arduino IDE. Connect TX1 Arduino pin to ESP TX pin and RX1 Arduino pin to ESP RX pin. Connect GPIO-0 to GND (just for setup).
Open the serial monitor in the Arduino IDE. Select baud rate 115200 and "Both NL & CR". Now you can send AT commands to the ESP.
When the ESP is powered up, the blue led blinks quickly 3 times then stays off, the red led stays on. If not, you have a connector problem. Check your wiring.

Through the serial monitor, send "AT". You should receive "OK".
Send "AT+CWLAP", it will list the available AP (access point, or wifi).
Send "AT+CWJAP="ssid","pswd"" with your wifi name and password, it will connect to your wifi. "AT+CWQAP" will disconnect from wifi.

The default baud rate is 115200. Leave it as it is.
When you finished, remove the GPIO-0 pin from ground, and connect TX to RX1 and RX to TX1 (as in the wiring diagram).

BLYNK

I’m using the Blynk app to create a smartphone app. It’s an easy graphical editor and it doesn’t require any coding. You can download the Blynk app from Google Playstore. Create an account and design your app.
You will receive an authorization code by email.
Download the Blynk library from here. Unzip it and copy to the Arduino library folder.
Copy the Blynk example code for the Arduino from herePaste it in the Arduino IDE, change authorization token, SSID and password of your Wifi.
You need more than one serial: one is for the USB communication to your PC, one is for the ESP8266. Some boards have multiple serial pins (hardware serial), others have only one, so you have to enable software serial and assign 2 pins to it. I’m using a Mega with multiple hardware serial so I deleted the software serial part of the code.
Upload it to your board. When you open the serial monitor, the Blynk code will start connecting to the Wifi and it will give you confirmation through serial monitor.


ARDUINO CODING

REMOTE CONTROLLER

This is easy: 2 inputs (value of the potentiometer and the status of the led), 1 output (start/stop the pump). Everytime a 1 is received through serial, the pump is toggled (on/off). A string is created with the values and sent to serial. The values are also displayed on the LCD. A delay is needed to avoid buffer overflow in the receiver.


#include <LiquidCrystal.h>
LiquidCrystal lcd(26, 27, 28, 29, 30, 31);
boolean pump = false;

void setup(){

pinMode(8, OUTPUT);
pinMode(7, INPUT);
Serial.begin(9600);
lcd.begin(16,2);
}

void loop() {

  if(Serial.available() > 0) {
  int bla = Serial.parseInt();
    if (bla==1) pump = !pump; 
    }
  digitalWrite(8,pump);
  float sensor = analogRead(0);
  int value = sensor / 1024 * 100;
  
  String dataStringWater = "";
    dataStringWater += "Water:";
    dataStringWater += " ";
    dataStringWater += value;
    dataStringWater += " ";
    dataStringWater += "%";
  String dataStringPump = "";
    dataStringPump += "Pump:";
    dataStringPump += " ";
    dataStringPump += (digitalRead(7));
  Serial.print (value);
  Serial.print ("/");
  Serial.println (digitalRead(7));
  
  lcd.clear();
  lcd.print(dataStringWater);
  lcd.setCursor(0,1);
  lcd.print(dataStringPump);

  delay(1000);
}


After you upload the code, remember to switch the wireless shield to "micro".

HOME CONTROLLER

This one is a bit harder. It will receive 2 values over serial (water level, pump status). The function Serial.parseInt() is used to get those values out of the serial string.
The Blynk program will start running when a serial monitor is open. If you want it to run by itself you have to delete the line "#define BLYNK_PRINT Serial".
Because I'm using a I2C LCD, I need to include the libraries Wire.h and LiquidCrystal_I2C.h. Also you have to find out the address of that I2C device. To do that upload and run this code. Now you can enter the address value.
I have multiple hardware serial so I deleted the software serial bit.
I had few problems in reading the values from the serial string until I added:
 "while(Serial.available())  Serial.read();
  delay(500);"
That cleans the buffer and avoid messy readings.
The BLYNK_WRITE() function has to stay out of the void loop().

//#define BLYNK_PRINT Serial

#include <ESP8266_Lib.h>
#include <BlynkSimpleShieldEsp8266.h>
#include <Wire.h>
#include <LiquidCrystal_I2C.h>

LiquidCrystal_I2C lcd = LiquidCrystal_I2C(0x3F, 16, 2);

char auth[] = "xxxxxxxxxxxxxxxxxxxxxxxxxxx";
char ssid[] = "xxxxxxxxxxxxxxxxxx";
char pass[] = "xxxxxxxxxxxxxxxxx";

// Hardware Serial on Mega, Leonardo, Micro...
#define EspSerial Serial1

// or Software Serial on Uno, Nano...
//#include <SoftwareSerial.h>
//SoftwareSerial EspSerial(2, 3); // RX, TX

#define ESP8266_BAUD 115200

ESP8266 wifi(&EspSerial);

void setup() {
  Serial.begin(9600);
  lcd.init();
  lcd.backlight();
  EspSerial.begin(ESP8266_BAUD);
  delay(10);
  Blynk.begin(auth, wifi, ssid, pass);
}

void loop() {

  int value = Serial.parseInt();
  int pump = Serial.parseInt();
  while(Serial.available())
  Serial.read();
  delay(500);
  
  String dataStringWater = "";
    dataStringWater += "Water:";
    dataStringWater += " ";
    dataStringWater += value;
    dataStringWater += " ";
    dataStringWater += "%";
  String dataStringPump = "";
    dataStringPump += "Pump:";
    dataStringPump += " ";
    dataStringPump += pump;

  lcd.clear();
  lcd.setCursor(0,0);
  lcd.print(dataStringWater);
  lcd.setCursor(0,1);
  lcd.print(dataStringPump);
  
  Blynk.run();
  Blynk.virtualWrite( V1, value);
  Blynk.virtualWrite( V2, pump);
}

BLYNK_WRITE(V5) {
// Assigning incoming value from pin V5 to a variable
 int pinValue = param.asInt(); 
 Serial.println(pinValue);
}

After you upload the code, remember to switch the wireless shield to "micro".


CONCLUSIONS

The project was successful, but it took longer than expected. I encountered several issues described below:

Issues

The 3.3V output of the Arduino doesn’t deliver enough power to the ESP8266. The Arduino provides up to 40mA, The ESP needs 250mA. I had to buy a separate power supply with voltage regulator. But when the 3.3V LV pin on the logic shifter was supplied from the 3.3V power supply, I had intermittent faults of connectivity. I solved it by connecting the 3.3V LV pin of the logic shifter to the 3.3V pin of the Arduino, and only connect the 3.3V power supply to the power pins of the ESP8266. Remember: if the ESP8266 blue led doesn't blink 3 times at startup, there's something wrong, probably in the wiring.
The Serial.parseInt() function was reading the wrong values sometimes. I fixed it by adding while(Serial.available()) Serial.read(); and delay(500); to clean the buffer.


Learning contents

During the development of the project and the research stage I learned about:
·         Frequency allocation and power limits (EIRP) in Australian Standards
·         Domestic router setup for static IP addresses
·         Wi-Fi modules and controllers (ESP8266)
·         Interface between different logics (5V, 3.3V, USB to serial), logic shifter and converter
·         Create a 2 way comms network with Xbee (2.4GHz)
·         Use multiple serial ports and set up virtual ports in the Arduino controller
·         Soldering and desoldering (some boards required modification or basic assembly)
·         Building pin header connectors using proper tools (wire stripper, crimping tool)
·         Building a smartphone app using an editor (Blynk)
·         Multiple power supplies of different voltages and current capabilities
·         I2C serial standard


Tuesday, November 20, 2018

Anycubic Photon review


Today I’m very happy to review this amazing printer. I’ve been looking for this print quality for a long time! I mainly print miniatures and models, so my FDM printers were pretty good, but not good enough. I made impressive miniatures, but they all needed rework like epoxy resin finish and smoothing with soldering iron. I was dreaming about resin printers for years until the Anycubic Photon was released. The first models had blue windows, not good to protect the UV sensitive resin. The latest models have proper orange windows. I bought one from the official Australian importer on Ebay for $465 AUD including a 500g resin bottle which is $50 alone. It’s usually around $550-600 AUD without resin but I was lucky at the auction.

The kit with all the accessories

The test print

SPECS

DLP (digital light processing) is a pretty new technology similar to SLA, but instead of moving lasers it uses a fixed UV led projector and a masking LCD screen. The LCD stands between the UV light and the resin tub to create a shadow, letting light pass only where it’s needed. The UV light that hits the bottom of the resin tub hardens the resin. The only moving part is the Z axis and it’s very precise (1.25um or 0.00125mm steps). The layer height can be set between 0.01 and 0.05 mm (10 to 50 microns). I always use 25 microns, it’s good enough for my miniatures, once painted you can’t see layers. But it’s good to know that I can get an even better definition if needed. The horizontal resolution is good too (47um against 400um of a standard FDM 0.4mm nozzle). The horizontal resolution is due to the masking LCD screen resolution (2560x1440 pixels).
One of the best “side effect” of this technology is that every layer takes the same time to print (set by you), no matter how big it is. It’s the time the resin takes to cure. Curing a dot or a large area takes the same time. So the best efficiency is achieved when printing multiple models. I usually print about 6 miniatures at the same time. And I rotate them to be as low as possible on the Z axis to reduce the number of layers and print time. This way I print 6 28mm miniatures in 4 to 5 hours.

THE KIT

The printer comes with all the tools you will ever need plus a spare resin vat film and a 250g resin bottle. There are clear instructions and the packaging is very secure. Straight out of the box, you need to align the platform, zero the Z axis and you are ready to print. Make sure the LCD screen and the bottom of the tub are always clean. You can leave the resin in the tub when not in use but it’s recommended that you pour it back in the bottle. You might want to filter it when you do that, there are filters in the kit.

SOFTWARE

The printer comes with a slicing software, very easy to use. You can scale, rotate, move multiple models and adjust the print settings like layer thickness, curing time per layer, first layer (to make sure it sticks on the platform). Like FDM printers it needs supports for overhang parts. You should rotate the models to minimize the parts that need support. Then you can add supports automatically or manually.
One of the downside of the software it’s that it doesn’t save your project. You can only save the sliced file or the stl file. But I know there are other software you can use to create the model with support and save your project, then use the Photon software just for the final slicing of the stl file.
After you slice the model, you can see the preview. Make sure the raft is printed from the first layer or it won’t stick on the platform. I failed a print because of that. Then I moved the model down 0.1 mm so the raft was actually lower than the platform and it started printing the raft from the first layer.
It’s pretty easy to use, you’ll figure it out in two or three prints.

PRINTING

The printer has a touch screen with a simple menu to test screen, adjust basic settings and print from USB (even the USB memory is provided!). During the print you won’t be able to see the first 20mm of the printed part because it’s still in the vat, so for 2-3 hours you won’t know how your print is going.
Finished print of two models
Finished print of six models (it takes the same time as printing two)

AFTER PRINTING

After the print finished, you remove the platform, then remove the printed part from the platform using a spatula. If you use a metal one, try not to scratch the platform as I did.

The model will be wet of resin, so it needs to be cleaned with isopropyl alcohol for few seconds by immersion or with a brush. It’s also soft, so it needs to be hardened with UV. After removing supports I leave them in the sun for an hour or two. Australian sun is rich of UV. But you can use a UV nail dryer or something like that.
Then you clean the platform. I use a lot of paper towel and alcohol after every print.

CONCLUSIONS

I was really impressed by this printer since unboxing it. It looks very professional, user friendly, it comes with tools, instructions and spare parts. It prints straight out of the box with amazing definition. The details on the printed models exceeded my expectations. Like all resin printers it requires lots of cleaning after print and you can’t use it in a normal room of your house due to the toxic nature of resin and bad smell. I use it in the garage. I highly recommend this printer if you print miniatures or small object that requires high precision in details and you are not scared of a bit of cleaning after every print.

Primed with gray

 "Washed" with black wash


Finished with metal dry brushing


Saturday, June 2, 2018

Plot a waveform and the sum of its harmonics in Excel


I made this spreadsheet to prove that a square wave is made by the sum of a fundamental sinewave and its odd harmonics. So, to transmit a digital signal you need a bandwidth much larger than the digital clock of the transmission. Adding more harmonics improve the shape of the squarewave, but it requires more bandwidth. In the following spreadsheet you can enter amplitude and frequency of the digital signal, and the bandwidth. The spreadsheet calculates values up to 14 harmonics. All the harmonics outside the bandwidth will be ignored. Also, you can select "odd", "even" or "all" harmonics. Just to see what happens.
The amplitude of the harmonics is the entered amplitude times 2 / (Ï€ x n), where n is the number of the harmonic.


Here I have a 100 Hz signal transmitted over a 5000 Hz bandwidth. As you can see, the square wave is pretty good.

Here you can see what you would see on a spectrum analyser:


Now I reduced the bandwidth to 1000Hz, so I only have 4 odd harmonics, and the square wave is not looking as good

The spectrum shows that only 4 odd harmonics plus the fundamental are in the bandwidth:

Now I selected all the harmonics (odd+even)

Thursday, June 30, 2016

CTC 3D Printer


I bought a CTC 3D printer on Ebay for 550AUD and I've been working on it for a while. It's a cheap printer, but easy to modify and make it as good as the expensive ones. It comes with heated bed and dual extruder, the build volume is 220mm x 150mm x 147mm. The hardware is driven by a Mightyboard. It's basically a cheap copy of the Fleshforge Creator.
Straight out of the box, one of the Y-axis ball bearings was broken (very noisy), so I had to replace it. The 40 mm fan at the bottom (to cool the board) was broken too, it's not really needed but I replaced it.
After some time researching the internet and working on it I achieved a level of quality I never seen before in FFF 3d printers. Here I summarize what I found and the results of my experience. I rated all the modifications by "effort" (how difficult or expensive) and "improvement" (results in the printer quality).


FIRMWARE UPDATE: SAILFISH (Effort 3 Improvement 7)
Everyone suggest to do it. I've seen an improvement in the print quality just doing this update. Plus, Sailfish add new and very useful tools and features to your CTC. Here is the process explained to update the firmware to Sailfish. It's a bit messy but it works and it's definitely worth it. One of my favorite functions is the ditto printing: it uses both extruders to print 2 of the same object at the same time, but the object can't be larger than the distance between the extruders (36mm).

Ditto printing with Sailfish firmware


SPOOL HOLDERS (Effort 2 Improvement 4)
The kit usually comes with one of them to attach on the back of the printer, but it doesn't fit the spools with smaller holes, so I printed two of this thinner ones.


The back of my CTC with the filament spools in place


PILLOW BLOCKS (Effort 7 Improvement 6)
One of the first thing I noticed is the y-axis bars bent and moving up and down when they rotate. To fix this you can print a pillow block in each corner (4) and insert a ball bearing to hold the bars. There are many designs on Thingiverse, I used this one (find the assembly instruction on the same page). The ball bearings are cheaper on Aliexpress than Ebay but it takes a couple of weeks for delivery from China to Australia. The rod is 5mm, I used 5x4x10mm ball bearings (no flange). Installing them is a precision job and require the disassemble of the frame. You also have to drill 2 holes per pillow block in the wooden panels to hold them in place with bolts and nuts. I don't know if this mod improved my print quality but definitely it looks more stable and the y-axis rod are kept straight.


The pillow blocks on the Y-axis bars with ball bearing


Z-SHAFT PRELOADER (Effor1 Improvement 6)
Another thing you will notice straight away is that the build platform moves a little bit because the vertical rods are not completely fixed on the frame. To fix that, you just need to print a very simple piece that push the bars forward and keep them in place. Very small effort but a big improvement in print quality because the platform doesn't move around anymore.

Z-axis preloader (left from thingiverse, right from my CTC)


DRIVE BLOCKS (Effort 5 Improvement 7)
The original drive blocks are fixed, which means they are not adjusted to the small changes in filament diameter. A spring loaded drive block compensates for these small changes and it's easy to remove and replace the filament, just pressing the lever to release the pressure. This design also make possible printing Ninjaflex and other flexible filaments, which would clog in the original drive block. I suggest to reuse the ball bearing of the original drive block (concave), but if you want to print flexible filament, a plain ball bearing might be better. If you don't want to print them yourself, you can buy them from Ebay and Aliexpress (some as cheap as 5$).


                     The driveblock, printed, assembled and mounted on the extruder


BUILDTAK (Effort 3 Improvement 6)
I always had problems with ABS non sticking on the build platform, I tried many materials including blue tape and ABS juice but I've never been very successful. I tried a Buildtak and I solved all the problems at once. It actually sticks too much now. You have to find the right settings with your slicer to print the first layer so it sticks but it's not difficult to remove after print. You might ruin the first BuildTak with your experiments before you find the right settings. I bought it from Aurarum, it's the right size for CTC and decent price. Just stick it on the aluminium plate.

My CTC with BuildTak from Aurarum


ACTIVE COOLING (Effort 8 Improvement 7)
If you want to print PLA properly you need a cooling system. This make sure the layers solidify before printing on top of them. Without it, the print quality with PLA was really messy.
You have to connect another fan (or blower) on the extruders and print a duct to guide the air to the printed part. You can wire the fan to the power supply and add a switch to the circuit, but this way you don't have software control over the active cooling, you have to switch it on and off manually. Or you can connect it to the Mightyboard, so you can control it by software. This is useful because you can adjust the power and the time on and off (usually print first layers without cooling to improve adhesion to the bed). To do that you need to add a component to the board. A MOSFET (PSMN7R0-30YL). It's not an easy soldering job, and it's easy to damage the MOSFET with heat or even just touching it (electrostatic discharge). Also if the pins are shorted (soldered together) it's possible to damage the whole board. So I suggest you to do it only if you are confident with it.

What you need:
-24V fan or blower (better)
-wires
-duct to guide the air to the printed parts.
-MOSFET and board connector or manual switch

Because I had to buy few extra, I'm selling them on Ebay as a complete kit. There's everything you need to make your active cooling, except the duct that you can print (better in ABS).
The complete kit as I'm selling it on Ebay

For the duct I used this design because it's mounted on the back, it can't be seen, it doesn't hide the nozzles and it blows air equally on both extrusions.

The active cooling blower and duct mounted on the back of the extruders


ENCLOSURE (Effort 8 Improvement 4)
To achieve the best results printing ABS, you have to keep the printing volume warm. If the printed part cools down, it will warp up. The active cooling must be switched off with ABS. To build my enclosure I used perspex (acrylic), I bought cheap left over from building companies. For the front door I used magnets, so I can remove it completely. The top hood can be removed quickly too, the back of the hood is fixed to the printer.
The measure I used are:
 
To join the sides of the hood i designed those joints (there's no hole, I drilled them after):
I didn't notice any improvement in printing ABS (it was sticking pretty well on the BuildTak anyway, and I manly print PLA), but the enclosure protect the printer from dust and attenuate the noise when printing. The front door is held by magnets, so it can be completely removed.

The hood can be removed quickly but the back remains in place

Angle joints (the angle was calculated on the measures in the picture above) 


Small magnets inserted in the frame and front window

To close the corners I printed 4 of these pieces, they fit very well.

My CTC with corner fillers


DUST FILTERS AND CONDUCT (Effort 5 Improvement 4)
Dust filters make sure no dust or dirt on the filament enter the extruders, risking to get stuck in the nozzle. I used this design, it make it easy to remove and replace filaments. You need to buy PTFE (teflon) tubes 6mm. They have very low friction. To fix them on the back of the printer I printed this part . Note that this will add some twist tension on your filament. If your PLA is too brittle (or cold room) the PLA filament will snap after few hours when the printer is not used. I still didn't solve this problem, but I'm not the only one. It definitely didn't happen in summer.

The dust filters block mounted on top of the extruders

The PTFE tubes holder (left from thingiverse, right from my CTC)


LIGHTS (Effort 4 Improvement 4)

Having a light you can turn off and on anytime you want inside the case is very useful. I bought these LED from Ebay, I designed a frame to hold them in place and point them to the middle of the build plate. I wired them in parallel with each other and in series with a switch and a potentiometer (if you don't add a resistance you will burn them), and straight to the 24V rail of the power supply. It requires some basic soldering and drilling the frame to fit the LED holders, switch and potentiometer.

LEDs and their holder


Lights switch and potentiometer


LUBRICANT (Effort 1 Improvement 4)
I've read many sources on internet and the best lubricant for 3D printers is dry PTFE. It creates a slippery and protective film on the rails and components, and it doesn't collect dust and dirt. I bought this in Bunnings for 13.5$. There are many others around.
Dry PTFE lubricant


BRONZE BUSHING (Effort 6 improvement 2)
Many people prefer bronze bushings because they are not as noisy as the linear ball bearings (on the x and y axis). I left the original ball bearings because noise is not an issue for me. Bronze bearing also provide automatic lubrication (they are impregnated with graphite).

Bronze bushing with graphite (picture from AliExpress)


ARM STIFFENERS (Effort 4 Improvement 3)
I didn't get those yet because they cost at least 40 AUD, but I'm thinking about it. Sometimes you have to put pressure on the platform to clean it and the plastic arms are not very robust. These on Aliexpress are the cheapest I found.

Arm stiffeners for platform (from www.p3-d.com)


SIMPLIFY 3D (Effort 6 Improvement 10)
I don't usually buy software, but this is worth every cent. It gives you total control, but you can start with basic features and learn new one once you need them. It's also very quick in slicing (nearly instantaneous) and the preview shows you exactly what your printer will do. I tried a cracked version at first and I decided to buy it. The support provides profiles for all printers. In AUD it's about 200$. Go to Simplify3D website.


CONCLUSION
The CTC printer is cheap, and it's not a good printer straight out of the box (you get what you pay!). If you have time and passion it can become a very good printer, very versatile and capable of amazing quality. I hope this post was useful for you, looking forward to hear your feedback.