More about 3D printing
I think the best way to learn 3D printing is to make something useful, functional, something you have to design yourself to match with other components.
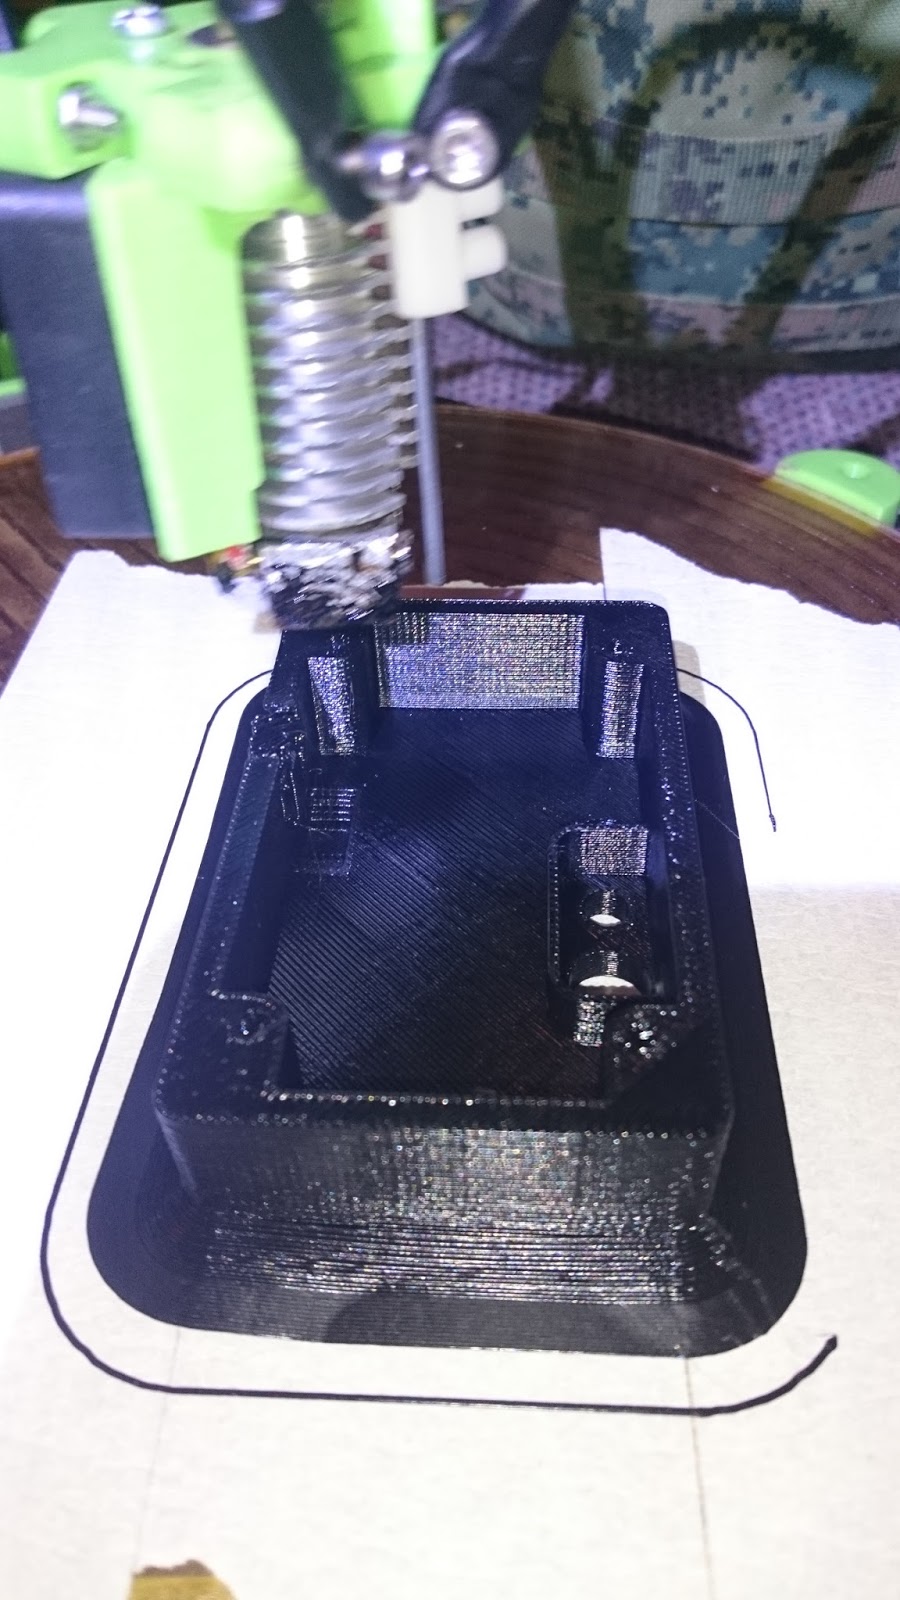
In my work it happens pretty often to break these small connection boxes at the back of the flood lights and we can't just buy the box to replace, we have to waste the whole light.


I decided then to print some of these connection boxes. I started measuring the existing boxes, thinking how to make them stronger and drawing it on Autocad.

WARPING ABS
Obviously they have to be as heat resistant as possible, so I decided to print in ABS. The biggest problem I had with ABS is called warping: ABS shrinks when it gets colder, so if you have a large area, the layers above will shrink causing the corners of the base to curl up from the plate.

- keep your bed hot, ideally around 110C. I used a IR thermometer to check the bed when hot and I found a couple of colder spots. I try not to put the edges of the base in these spots. To do that I offset the center of my print with the slicer software.
- clean the bed: if you print on glass or aluminium clean your plate with acetone before every print, ABS won't stick well on a dirty plate.
- I tried to print on paper tape and it sticks very well. It was even difficult to remove it after the print
- Print on the small side: warping is proportional to the area of the base so, when possible, make your base on the smallest side
- ABS juice: that's messy but effective. You will need to make this juice, melting some ABS in acetone.


And spread it on the bed:
 There are some instructions about how to make it and how to use it here:

You can make denser ABS juice (ABS slurry) and use it to fill gaps and fix cracks as I did here:

You don't need to make a mess as I did, just fill the crack.
I also used ABS slurry to reinforce the base of this vase on the inside (I just poured inside and spreaded), but the acetone in the slurry melted the thin base and made it stick on the surface where it was standing (a paper towel).

KISSLICER SETTINGS
I learned also how to change some settings on my favorite slicer to prevent warping:
- Infill width: if you make it smaller than your extrusion width (the diameter of your nozzle), it will leave a small gap between the extruded filaments (when printing with 100% infill). This will make the part weaker, but less prone to warping.
- Brim: if you write any number in this box, it will print a base around your printed part, to increase the grip on the bed. The number you write is how many millimeters this base will be larger than your part on each side. The brim height is how high this base will be. If you tick the "fillet box" it will start with the brim height attached to the part and it will gradually decrease to one layer to the outer loop of brim. I often use a brim diameter 10, height 5 with fillet, as in the picture:
Another option I change often is the number of loops (in the perimeter of each layer): if I'm printing an empty or partial empty part, I need 2 or 3 loops on the perimeter to make the part strong, but sometimes they don't stick on each other very well, causing the outer skin to peel off (on straight vertical surfaces), like in the picture:

Another very effective way to reduce warping is to make sure the first layer is weel spreaded on the plate. To do that I set an offset of 0.1mm on the Z axis. This way the noozle touches the plate and spread the plastic on the plate. The first layer will look messy during the print, but it will be fine later, and the part will stick on the plate much stronger.
ACETONE SMOOTHING
ABS melts with acetone. The best way to use acetone to smooth the surfaces is in form of vapor. I pour small quantity of acetone in a glass jar or small container (make sure it's not affected by acetone). The ABS part shouldn't touch the acetone, so It must be standing on a platform or hung from above. But when you make your supports, consider that your part will get soft and could break around a hook or stick on a platform (it all happened to me). I like to smooth transparent ABS because it gets very shiny and you can see through it.
- Cold: to make sure the vapors are spread equally around the part, I cover the side inside the jar with toilet paper, which absorb acetone and make it work on the sides of the part. It takes about 30 minutes to 1 hour. In the picture, the big one is just printed and the small one is smoothed with cold acetone vapor:


Not only the part will look good, it will be also much stronger as the layers are melted together on the surface.
I tried this process on one of my connection boxes and I noticed that it shrunk a lot in the process, to the point that it doesn't match with the other components. I measured about 2% shrink on all dimensions.
I tried this process on one of my connection boxes and I noticed that it shrunk a lot in the process, to the point that it doesn't match with the other components. I measured about 2% shrink on all dimensions.
RESIN SMOOTHING
Sometimes I print in PLA, because it's easy. PLA is not affected by acetone so there are different ways to smooth the surface. I bought a kit of XTC-3D from 3D Printing Studios in Fremantle. It's some kind of epoxy resin with longer cure time.
Here you can see a review of this product from the guy who sold it to me.
It's a very strong coating, slightly flexible and light. It doesn't affect any plastic, it just fills the gaps between the layers, making the surface smooth. It can be sanded and colored with acrylic. It has a good effect on layers 0.2 mm thick or lower, but if you print 0.3 mm and over, you might have to apply it twice.
In conclusion, it doesn't make the part stronger like acetone vapor, but it creates a very hard surface around it, and it doesn't have the problems of acetone smoothing (deformations, shrinking, hazards).

In this picture the large crystal is coated
with XTC-3D and the small one is smoothed
with acetone vapor. The look is very similar.

I applied a lot of XTC-3D on this vase but it
needs a second layer for perfect smoothing.
CONCLUSIONS
After all these problems and experiments I'm finally happy with my connection boxes, I just need to test them for heat resistance and insulation.


1 - Printed
2 - Assembled
3 - Installed
4 - Wired
5 - Tested


